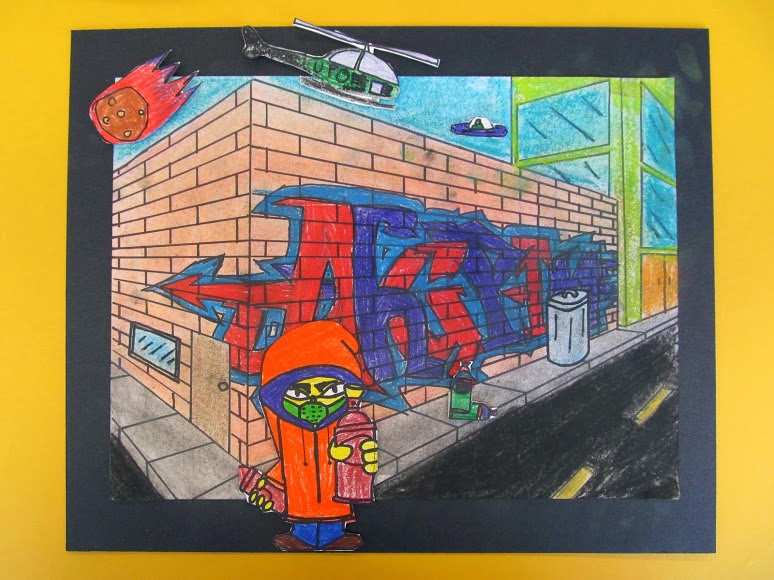
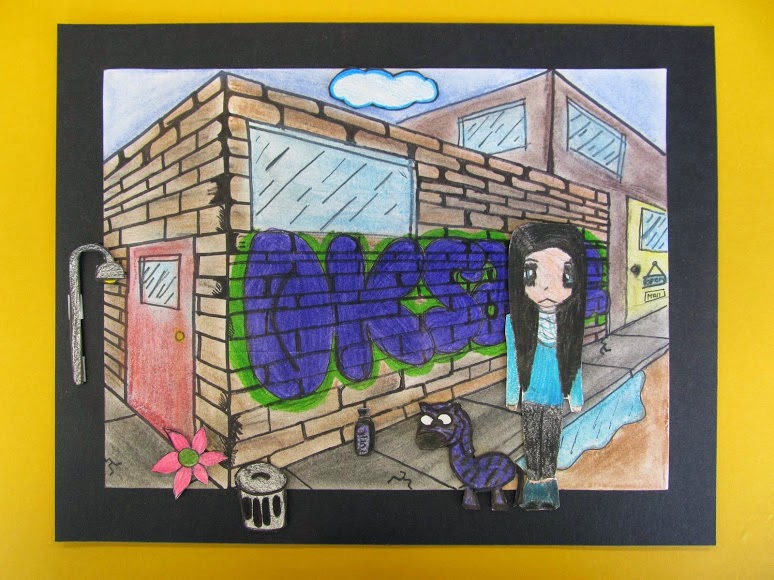
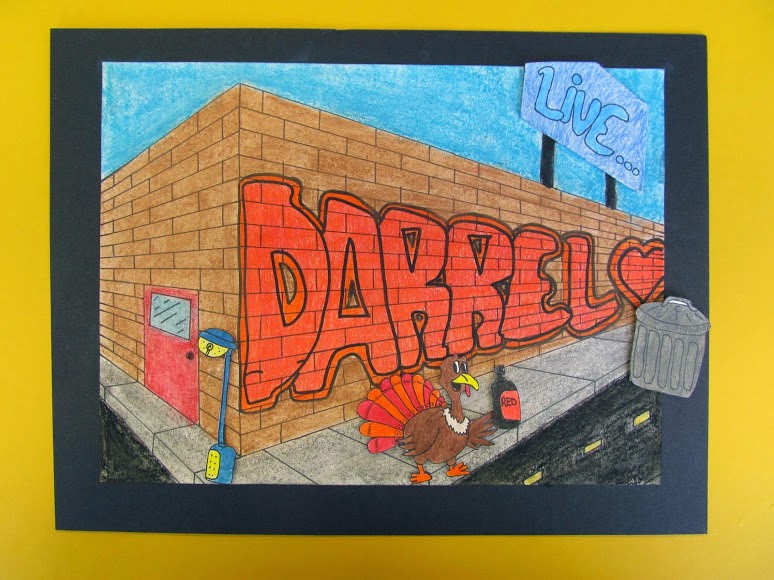
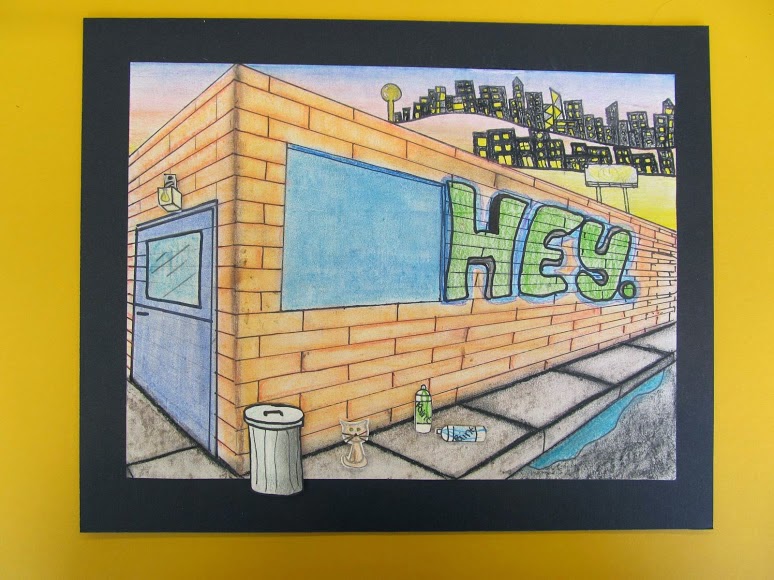
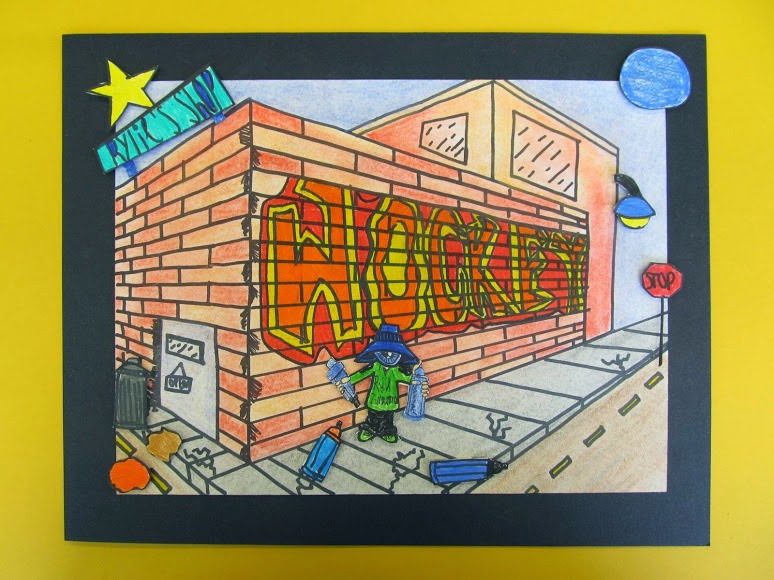
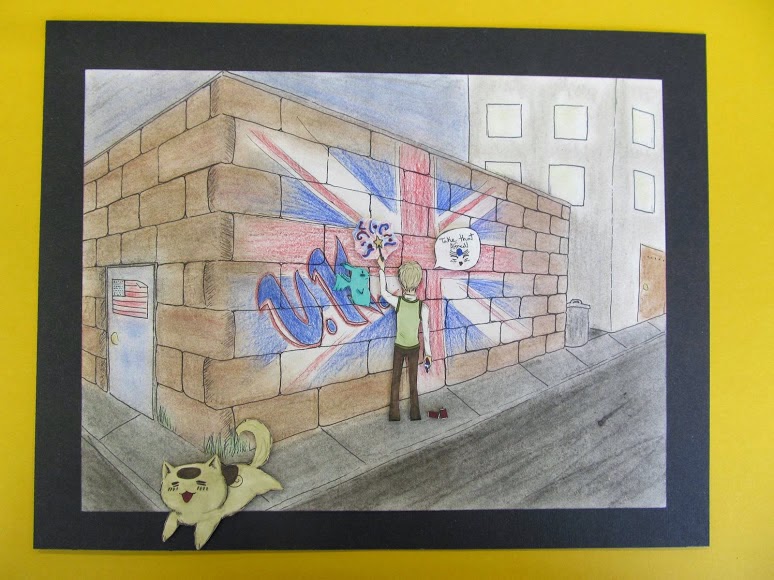
Welcome back from the long weekend. This week, we will be learning about 2 point perspective. We will use 2 point perspective to make a drawing of a street corner. . .And, we will incorporate graffiti! You can learn more about this project below.
1. Choose one of the sites below to customize your shoes (yes, you can design and print more than 1 shoe)
MiAddidas NikeId Vans Converse 2. Once you have a design you like, print your shoe. 3. If your shoe doesn't print (or prints weird). . .Try this "work around" -push down the "prnt scrn" button (on the top of your keyboard) -while still holding down the "prnt scrn" button, push the "windows" button (near the spacebar) -it will look like nothing has happened (that's okay) -open up MS Word -paste (you can hold down "ctrl" and "v" to paste) -your shoe should appear -print! 4. If you finish early - you may visit any of the sites listed on the right-hand side of this page. YOU MAY NOT GO ANYWHERE ELSE ONLINE! This week, 8th graders will be learning all about contour lines. They will go online and design their own sneakers, print the image, and then create a contour line drawing of their image. You can learn more about contour lines below. Contour line from ksumatarted Guys, we are drawing leaves this week. Sometimes, students get the outline of the leaf and think that they are done. . .But leaves are ALL ABOUT THE DETAILS. Check out this great fast-forwarded video of a student getting all of the details in her leaf drawing. This week, we will be synthesizing what we have learned in previous grades about watercolor and adding new skills to make realistic paintings of fall leaves. You can learn more about watercolor below. Watercolor from ksumatarted This week, we will be learning about Vasily Kandinsky and non-objective art. You can learn more about this in PPT below.
This week, we will be examining Pop Art and making our own pop art. You can learn more about Pop Art in the PPT below.
Woot! I am SO excited to be teaching you art at PMMS this year! Below, is a copy of our class syllabus. Use this page to find updated information about what we are doing in class.
1. Find a picture you want to turn into a stencil. It is easier to use pictures with solid-colored backgrounds
2. Follow the directions in the video3. Hint: Go to Pixlr.com, click on the butterfly, choose "open image from computer" to get started. 3. Upload your picture to our group Edmodo. Edmodo join code: hx8gyv 4. Visit one of the "I'm Finished" links on the right-hand side of this page. **If you don't upload to Edmodo, I can't print your stencil. You will have to make a Tshirt with one of my designs (and I'm not as cool as you, so. . . ) P.S. If you need extra-inspiration, here is our PPT for this unit: This week, we will study civil war photography. Matthew Brady is one of the first photojournalists. He took many pictures during the civil war. . .Most of what we know about what the civil war looked like is due to Matthew Brady. You will complete two tasks this week. 1) You will colorize a civil war era photograph, and 2) you will take a modern version of the photograph starring yourself and/or people you know. First, let's focus on colorizing old photos. 1. Go to the STUDrive, Handouts, Johnson, and then "civil war photography" 2. Choose a photo 3. Go to Pixlr.com 4. Click on the Butterfly (advanced) 5. Choose "open image from computer" 6. Go and find the civil war photograph you like 7. Your photo should now be open in Pixlr 8. Click to create a new layer (see picture below) 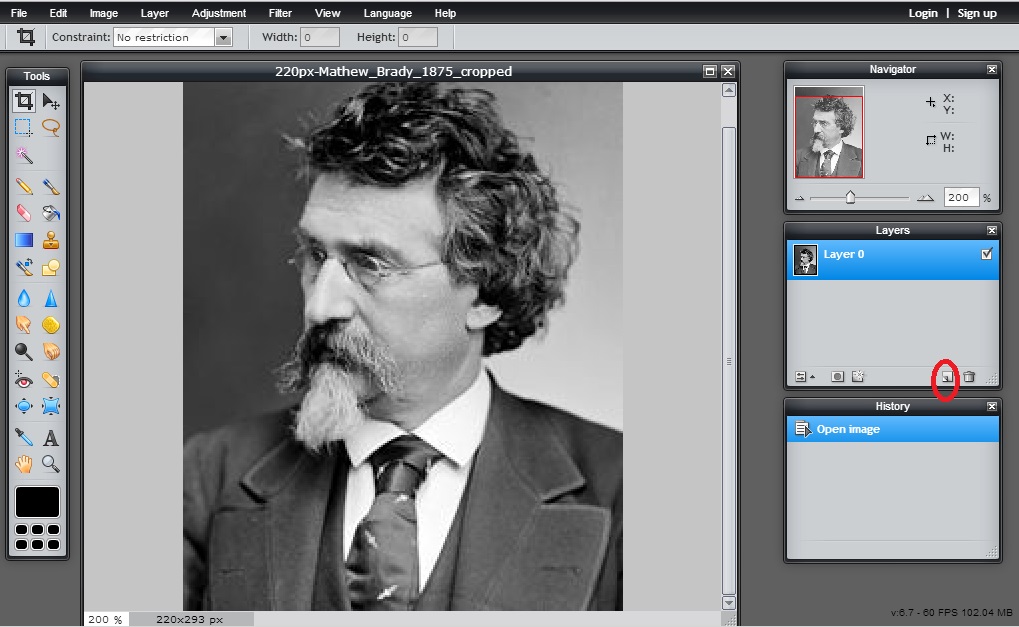
9. Use the magic lasso tool to draw an outline around an area you want to color (see picture below) 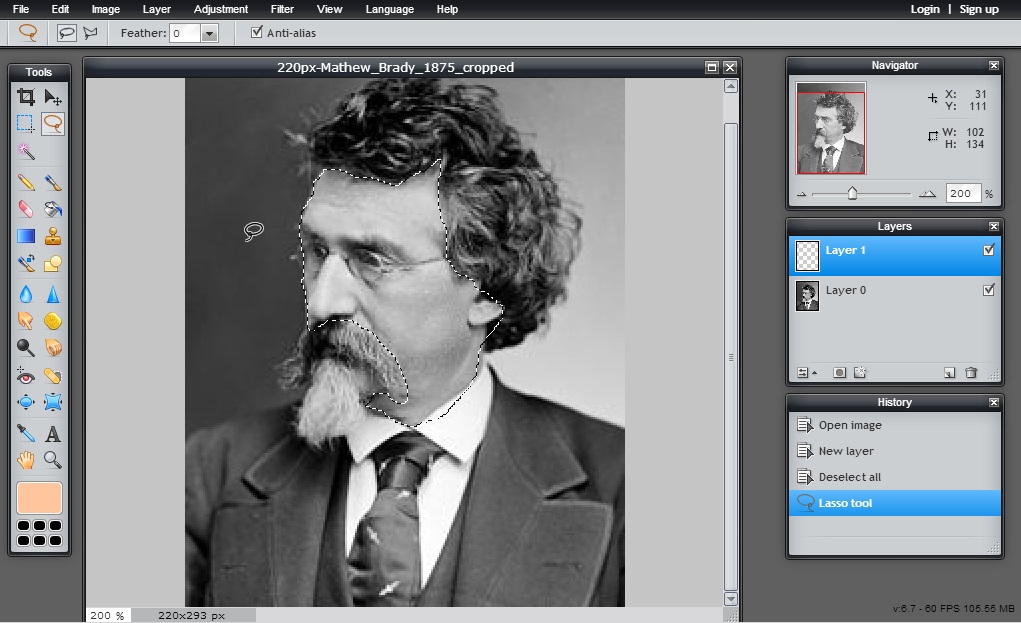
10. Click on the color chooser (in the bottom of the tool box) and choose a color. You probably want the color to be a pastel/pale version of the color you want (see photo below). 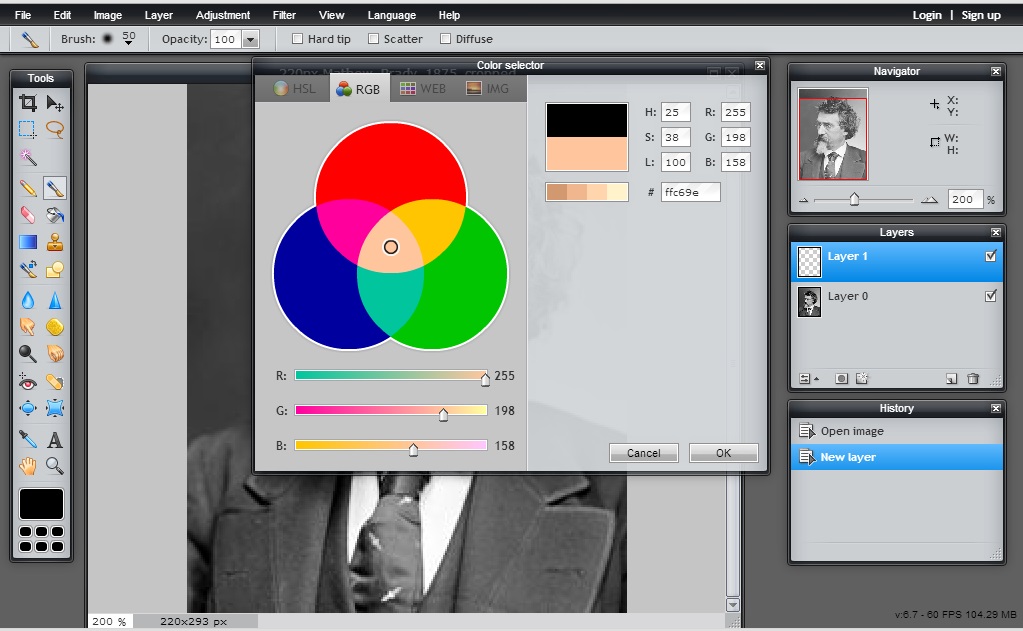
11. Click on the paintbrush tool. Turn the opacity on the paintbrush tool to 50% or lower (see photo below). 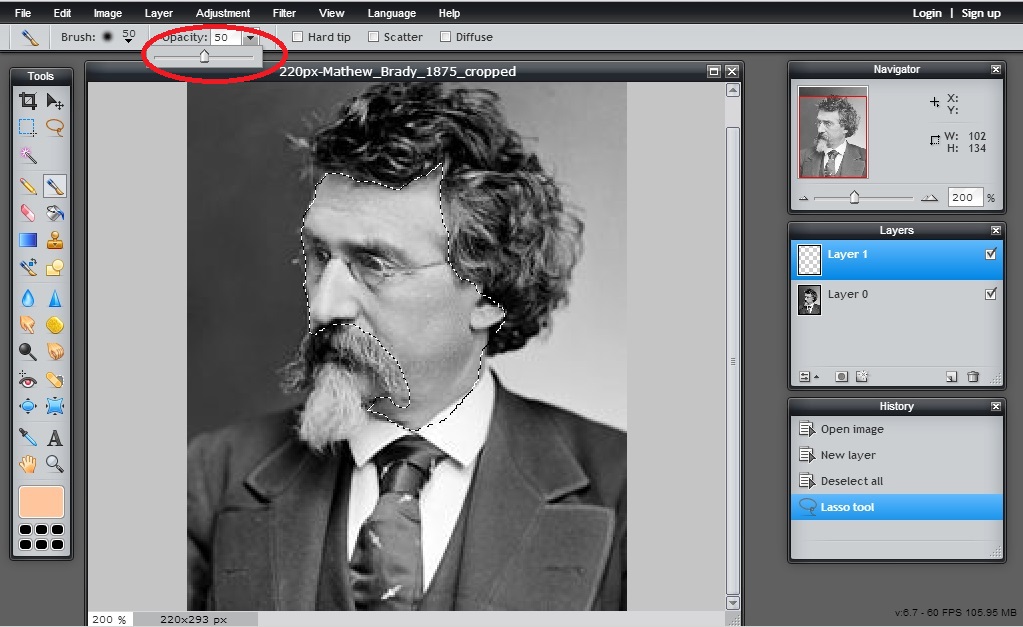
12. Use the paintbrush tool and paint in the area you highlighted with the magic lasso tool. 13. If the color is too dark (you can't see enough of the portrait peeking through), you can play with the opacity of the layer (see photo below). 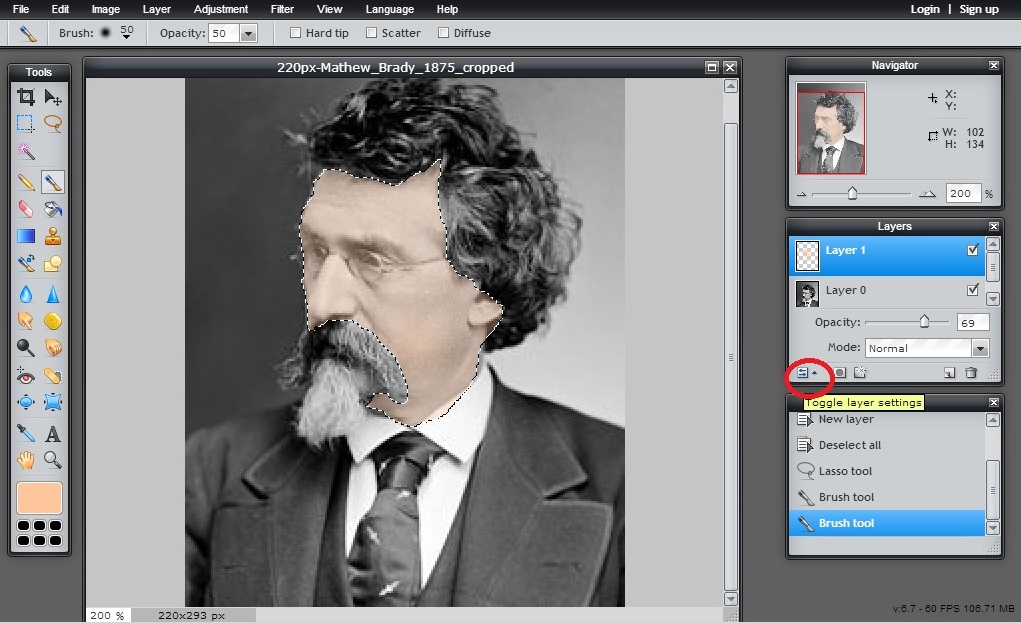
Repeat steps 8-13 until you are finished. SAVE OFTEN. Pixlr likes to crash!!!
| 8th Grade Art8th GA Art Standards ArchivesJanuary 2015 "I'm Finished" Sites Scratch Code Academy Be an Architect ArtPad Bomomo Build Your Wild Self Jackson Pollock (Splatter Painter) Mr. Picasso Head Mondriamat Tesselator Getty Art Museum Games Art Games Marilyn Maker Samorost (game) The Color Test Leonardo Da Vinci's Workshop Make Belief Comic-Strip Maker Mandala Maker ToonDoo (Cartoon Maker) |
 RSS Feed